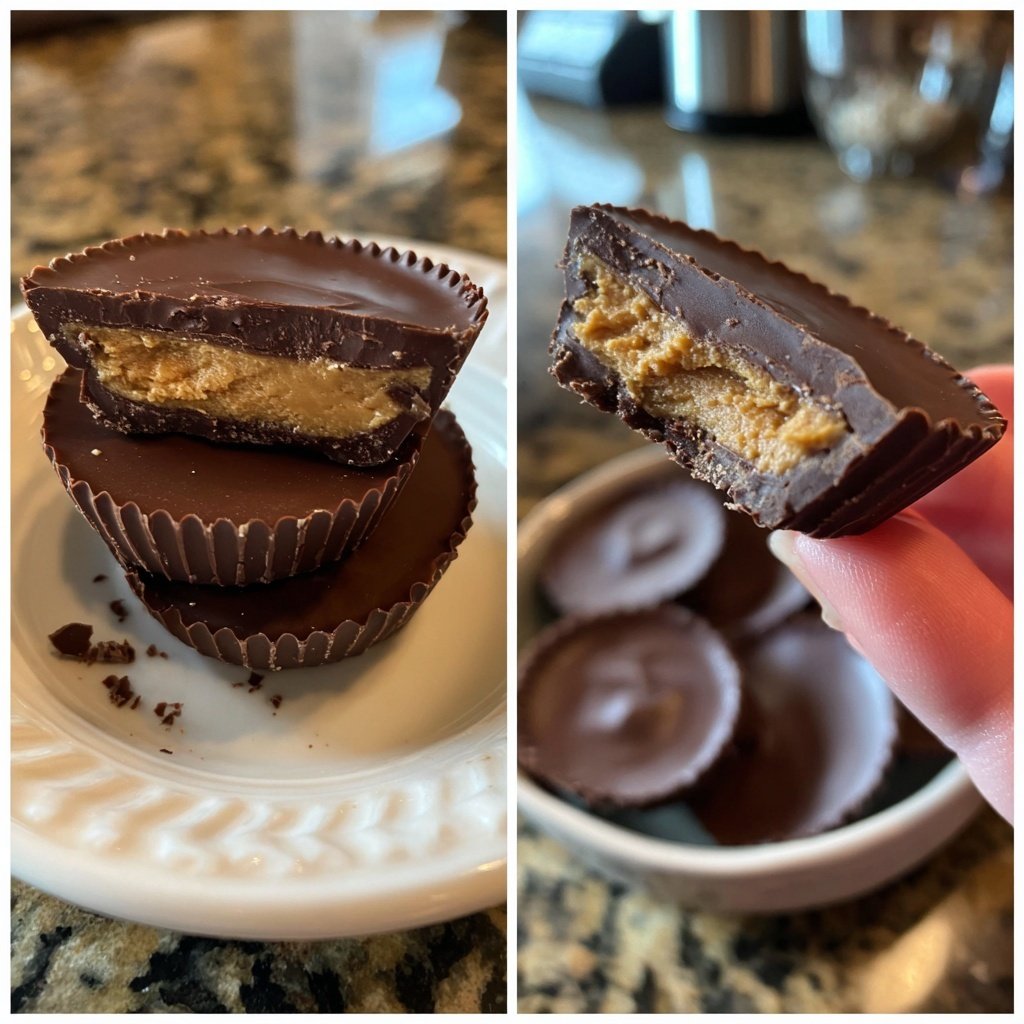
Homemade Reese’s Cups Dark Chocolate
Highlighted under: Oven Planning
I absolutely love indulging in rich, dark chocolate and the creamy notes of peanut butter. Making my own Reese's Cups at home is a delightful experience that allows me to customize the sweetness and flavor to my preference. The convenience of having these treats ready to grab whenever I need a sweet fix makes it even better. Trust me, once you taste the combination of smooth dark chocolate and velvety peanut butter, you'll never want to go back to store-bought versions!
When I first attempted to make Reese's Cups from scratch, I was amazed at how simple yet satisfying it was. The key to achieving that perfect texture is in the melting process—gently heating the dark chocolate until it’s creamy prevents any gritty texture that tends to come from high heat. I also played around with the peanut butter filling, adding a pinch of sea salt that elevates each decadent bite.
What I love most about this recipe is the ability to control the thickness of the chocolate and peanut butter layers. I recommend using a silicone mold as it ensures easy removal, and I often customize the ratio for extra crunch by mixing in crushed peanuts. This personalized touch has turned these homemade treats into a favorite among my friends and family!
Why You'll Love This Recipe
- Rich chocolate flavor paired with creamy peanut butter
- Customizable sweetness to match your taste
- Perfect for sharing or as a personal indulgence
Key Technique Tips for Perfect Cups
The melting process of the chocolate is crucial for achieving that glossy finish and smooth texture. Use a microwave-safe bowl for melting the chocolate chips and coconut oil together. Heat them in 30-second intervals, stirring each time, until the chocolate is fully melted and combined. This gentle approach prevents burning and ensures the chocolate retains its rich flavor. If you overheated the chocolate and it becomes thick or clumpy, try adding a teaspoon of coconut oil and reheating briefly, stirring until smooth again.
When preparing the molds, it’s important to pour an even layer of melted chocolate into the bottom of each liner. Aim for a layer that’s about a quarter of an inch thick; this helps ensure a solid base that can support the peanut butter filling. After pouring the chocolate, tap the muffin tin against your countertop to eliminate air bubbles and create a smooth surface. This step enhances both the appearance and texture of your Reese’s Cups.
Peanut Butter Filling Variations
While the classic creamy peanut butter is delicious, this recipe allows for some fun adaptations to personalize your cups. For a healthier option, consider using natural peanut butter, which has a different texture but adds unique nuttiness. You may need to adjust the powdered sugar to achieve your desired sweetness, as natural varieties can have a stronger flavor. If you prefer a bit of crunch, swap out the creamy peanut butter for chunky peanut butter to add texture to your cups.
Another tasty variation is to add flavor extracts to the filling. A teaspoon of vanilla extract or a pinch of cinnamon can elevate the taste, giving a more complex profile to each bite. Moreover, for those who are looking for a vegan alternative, simply substitute the powdered sugar with maple syrup or agave nectar, adjusting the amount to avoid making the filling too runny.
Make-Ahead and Storage Tips
These homemade Reese’s Cups can be made ahead of time, making them perfect for parties or as a sweet treat throughout the week. Once your cups have cooled and hardened in the fridge, carefully remove them from the cupcake liners. To keep them fresh, store them in an airtight container in the refrigerator for up to two weeks. This not only maintains their texture but also enhances the flavors over time as they meld together.
If you're looking to extend the life of your treats, consider freezing them. To do this, place the filled and set cups on a baking sheet in a single layer and freeze them until solid. Then transfer them to a freezer-safe bag or container. They’ll keep well for about two to three months. Just be sure to let them thaw in the refrigerator before enjoying, as this will ensure the chocolate remains firm yet melt-in-your-mouth delicious.
Ingredients
For the Chocolate Cups
- 2 cups dark chocolate chips
- 1 tablespoon coconut oil
For the Peanut Butter Filling
- 1 cup creamy peanut butter
- 1/2 cup powdered sugar
- 1/4 tsp salt
Instructions
Melt the Chocolate
In a microwave-safe bowl, combine dark chocolate chips and coconut oil. Heat in 30-second intervals, stirring in between, until the mixture is smooth and well combined.
Prepare the Molds
Line a muffin tin with cupcake liners. Pour a layer of melted chocolate into the bottom of each liner, enough to cover the base. Tap the tin gently to smooth out the chocolate.
Make the Filling
In a mixing bowl, combine creamy peanut butter, powdered sugar, and salt. Mix until smooth and spreadable.
Assemble the Cups
Once the bottom layer of chocolate has set slightly, scoop about a tablespoon of the peanut butter mixture and place it in the center of each cup. Cover with more melted chocolate until the peanut butter is completely covered.
Chill and Serve
Place the muffin tin in the refrigerator for at least 15 minutes or until the chocolate has fully hardened. Enjoy your homemade Reese’s Cups!

Pro Tips
- For an extra depth of flavor, try using chocolate with a higher cocoa percentage or adding a sprinkle of flaky sea salt on top before chilling.
Troubleshooting Common Issues
It’s not uncommon to encounter a few hiccups when making candy, especially for those new to chocolate work. If your chocolate seizes and becomes grainy during melting, this can happen if even a small amount of moisture gets in. To fix it, add a small amount of coconut oil or vegetable oil to help smooth it out. This can save your batch, transforming the seizing into a creamy chocolate blend.
In case your peanut butter mixture feels too thick and difficult to spread, don’t hesitate to pop it in the microwave for about 10-15 seconds. This little heat can make it much easier to work with. Just be cautious not to overheat it, as you want it to remain thick enough to hold its position within the chocolate.
Serving Ideas for Your Reese’s Cups
These delightful treats can be enjoyed on their own, but there are several ways to elevate their presentation for special occasions. Consider arranging them on a decorative platter and garnishing with a sprinkle of sea salt or crushed nuts for a gourmet touch. This adds an appealing aesthetic and enhances the taste with contrasting textures.
If you’re feeling adventurous, try pairing your homemade Reese’s Cups with complementary flavors. A side of fresh strawberries or a light fruit salad can provide a refreshing balance to the richness of the chocolate and peanut butter. Alternatively, serving them alongside a scoop of vanilla ice cream can create a decadent dessert that is both satisfying and indulgent.
Questions About Recipes
→ Can I use milk chocolate instead of dark chocolate?
Yes, feel free to substitute with milk chocolate for a sweeter taste.
→ How long do these homemade cups last?
They can be stored in an airtight container in the fridge for up to two weeks.
→ Can I add ingredients to the peanut butter filling?
Absolutely! Chopped nuts or a drizzle of honey can enhance the flavor.
→ Is there a vegan option for this recipe?
Yes, you can use dairy-free dark chocolate and substitute the powdered sugar with a vegan-friendly alternative.
Homemade Reese’s Cups Dark Chocolate
What You'll Need
For the Chocolate Cups
- 2 cups dark chocolate chips
- 1 tablespoon coconut oil
For the Peanut Butter Filling
- 1 cup creamy peanut butter
- 1/2 cup powdered sugar
- 1/4 tsp salt
How-To Steps
In a microwave-safe bowl, combine dark chocolate chips and coconut oil. Heat in 30-second intervals, stirring in between, until the mixture is smooth and well combined.
Line a muffin tin with cupcake liners. Pour a layer of melted chocolate into the bottom of each liner, enough to cover the base. Tap the tin gently to smooth out the chocolate.
In a mixing bowl, combine creamy peanut butter, powdered sugar, and salt. Mix until smooth and spreadable.
Once the bottom layer of chocolate has set slightly, scoop about a tablespoon of the peanut butter mixture and place it in the center of each cup. Cover with more melted chocolate until the peanut butter is completely covered.
Place the muffin tin in the refrigerator for at least 15 minutes or until the chocolate has fully hardened. Enjoy your homemade Reese’s Cups!
Extra Tips
- For an extra depth of flavor, try using chocolate with a higher cocoa percentage or adding a sprinkle of flaky sea salt on top before chilling.
Nutritional Breakdown (Per Serving)
- Calories: 380 kcal
- Total Fat: 26g
- Saturated Fat: 15g
- Cholesterol: 195mg
- Sodium: 85mg
- Total Carbohydrates: 32g
- Dietary Fiber: 3g
- Sugars: 24g
- Protein: 6g