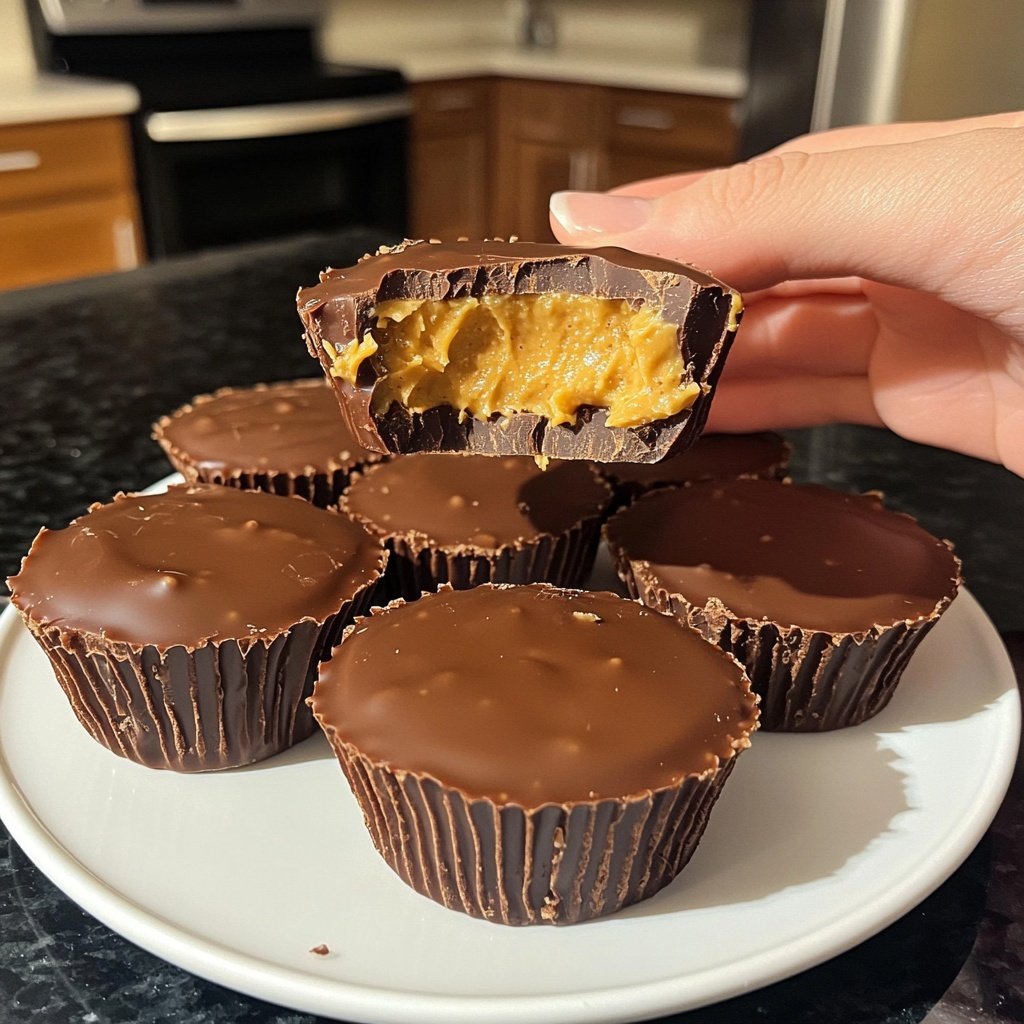
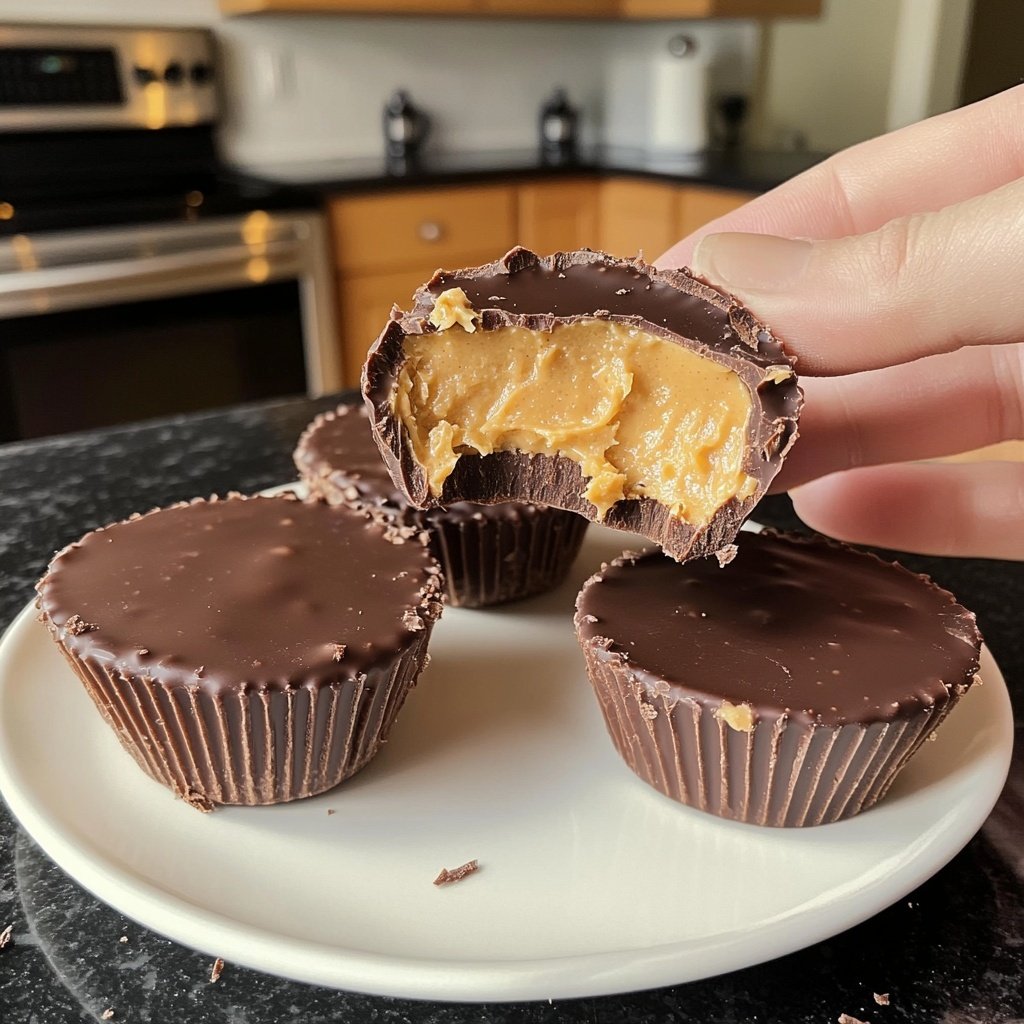
Homemade Reese’s Cups Recipe
Highlighted under: Oven Planning
Indulge in the classic taste of chocolate and peanut butter with these easy-to-make homemade Reese’s Cups.
Making your own Reese’s Cups at home is a fun and rewarding experience. With just a few simple ingredients, you can create a delicious treat that rivals the store-bought version.
Why You Will Love This Recipe
- Rich chocolate flavor paired with creamy peanut butter
- Customizable with your favorite chocolate types
- Perfect for sharing or enjoying as a personal treat
The Joy of Homemade Treats
There's something magical about making treats from scratch, especially when it comes to classic favorites like Reese’s Cups. Not only do you get to control the ingredients, but you also get to indulge in the process of creating something delicious. The satisfaction of biting into a creamy peanut butter cup that you've made yourself is unparalleled. Plus, your kitchen will smell heavenly with the rich aroma of melting chocolate and the sweet scent of peanut butter.
Homemade treats can also cater to your dietary preferences and restrictions. Whether you prefer dark chocolate, vegan options, or need to avoid certain allergens, making your own Reese’s Cups allows for endless customization. This recipe serves as a base that you can adapt to suit your tastes, ensuring that everyone can enjoy a sweet treat tailored just for them.
Perfect for Any Occasion
These homemade Reese’s Cups are perfect for any occasion, whether it's a birthday party, a holiday gathering, or just a cozy night in. They make fantastic gifts when wrapped in decorative packaging, adding a personal touch that store-bought options can't match. Imagine the joy on your loved ones' faces when they receive a box filled with your homemade treats!
Additionally, they are simple enough to make as a fun activity with kids. Involving children in the kitchen not only teaches them valuable skills but also creates lasting memories. Plus, who wouldn’t want to help make their own candy? It's an engaging way to bond and share the love of cooking.
Storage and Shelf Life
Once you've made your delicious Reese’s Cups, proper storage is key to maintaining their freshness. Store them in an airtight container in the refrigerator to keep them firm and delicious. They can last up to two weeks if kept properly, but they likely won't last that long in a household full of chocolate lovers!
If you're looking to enjoy these treats later, you can also freeze your Reese’s Cups. Just be sure to wrap each cup individually in plastic wrap or place them in a freezer-safe container. When you're ready to enjoy them, simply let them thaw at room temperature for a few minutes before indulging in that creamy goodness.
Ingredients
For the Cups
- 1 cup milk chocolate chips
- 1 cup semi-sweet chocolate chips
- 1 cup creamy peanut butter
- 1/2 cup powdered sugar
- 1/2 teaspoon vanilla extract
- 1/4 teaspoon salt
Make sure all ingredients are at room temperature for the best mixing results.
Instructions
Melt Chocolate
In a microwave-safe bowl, combine the milk chocolate chips and 1/2 cup of the semi-sweet chocolate chips. Microwave in 30-second intervals, stirring in between, until melted and smooth.
Prepare Cup Liners
Line a muffin tin with cupcake liners and pour a small amount of the melted chocolate into each liner, just enough to cover the bottom. Use a spoon to spread it evenly.
Make Peanut Butter Filling
In a mixing bowl, combine peanut butter, powdered sugar, vanilla extract, and salt. Mix until smooth and creamy.
Fill with Peanut Butter
Once the chocolate has set slightly, add a spoonful of the peanut butter mixture on top of the chocolate in each cup, spreading it gently.
Top with Chocolate
Pour the remaining melted semi-sweet chocolate over the peanut butter layer, ensuring each cup is fully covered. Tap the tin gently on the counter to remove air bubbles.
Chill to Set
Place the muffin tin in the refrigerator for about 20 minutes, or until the chocolate has fully set.
Serve and Enjoy
Once set, remove the cups from the liners and enjoy your homemade Reese’s Cups!
Store any leftovers in an airtight container in the refrigerator.
Pro Tips
Experiment with different types of chocolate for a unique flavor!
Tips for Success
To ensure your Reese’s Cups turn out perfectly, it's crucial to melt the chocolate slowly and steadily. Microwaving in short intervals helps prevent overheating, which can lead to a grainy texture. Stirring frequently will also help achieve that silky-smooth consistency that's ideal for coating.
When filling the cups with peanut butter, be generous but mindful not to overfill. A balanced layer of chocolate and peanut butter is key to achieving that classic taste. If you find the peanut butter mixture too thick, a touch of coconut oil can help create a smoother filling that spreads easily.
Flavor Variations
Feel free to experiment with different types of chocolate! While this recipe uses milk and semi-sweet chocolate, dark chocolate, white chocolate, or even flavored chocolate can give your cups a unique twist. Each chocolate type brings its own distinct flavor profile that can elevate your homemade treats.
You can also add a pinch of sea salt on top of the chocolate layer before chilling for a delightful sweet-and-salty contrast. For a little crunch, consider folding crushed nuts or even crispy rice cereal into the peanut butter filling, adding texture and an extra layer of flavor to your Reese’s Cups.
Questions About Recipes
→ Can I use natural peanut butter?
Yes, natural peanut butter can be used, but it may alter the texture slightly.
→ How do I store leftover cups?
Store them in an airtight container in the refrigerator for up to a week.
→ Can I make these vegan?
Yes, use dairy-free chocolate and a vegan peanut butter option.
→ What can I substitute for powdered sugar?
You can use coconut sugar or make your own powdered sugar by blending granulated sugar until fine.
Homemade Reese’s Cups Recipe
What You'll Need
For the Cups
- 1 cup milk chocolate chips
- 1 cup semi-sweet chocolate chips
- 1 cup creamy peanut butter
- 1/2 cup powdered sugar
- 1/2 teaspoon vanilla extract
- 1/4 teaspoon salt
How-To Steps
In a microwave-safe bowl, combine the milk chocolate chips and 1/2 cup of the semi-sweet chocolate chips. Microwave in 30-second intervals, stirring in between, until melted and smooth.
Line a muffin tin with cupcake liners and pour a small amount of the melted chocolate into each liner, just enough to cover the bottom. Use a spoon to spread it evenly.
In a mixing bowl, combine peanut butter, powdered sugar, vanilla extract, and salt. Mix until smooth and creamy.
Once the chocolate has set slightly, add a spoonful of the peanut butter mixture on top of the chocolate in each cup, spreading it gently.
Pour the remaining melted semi-sweet chocolate over the peanut butter layer, ensuring each cup is fully covered. Tap the tin gently on the counter to remove air bubbles.
Place the muffin tin in the refrigerator for about 20 minutes, or until the chocolate has fully set.
Once set, remove the cups from the liners and enjoy your homemade Reese’s Cups!
Extra Tips
Experiment with different types of chocolate for a unique flavor!
Nutritional Breakdown (Per Serving)
- Calories: 380 kcal
- Total Fat: 26g
- Saturated Fat: 15g
- Cholesterol: 195mg
- Sodium: 85mg
- Total Carbohydrates: 32g
- Dietary Fiber: 3g
- Sugars: 24g
- Protein: 6g