Red Velvet Cake for Valentine’s Day
Highlighted under: Festive Planning
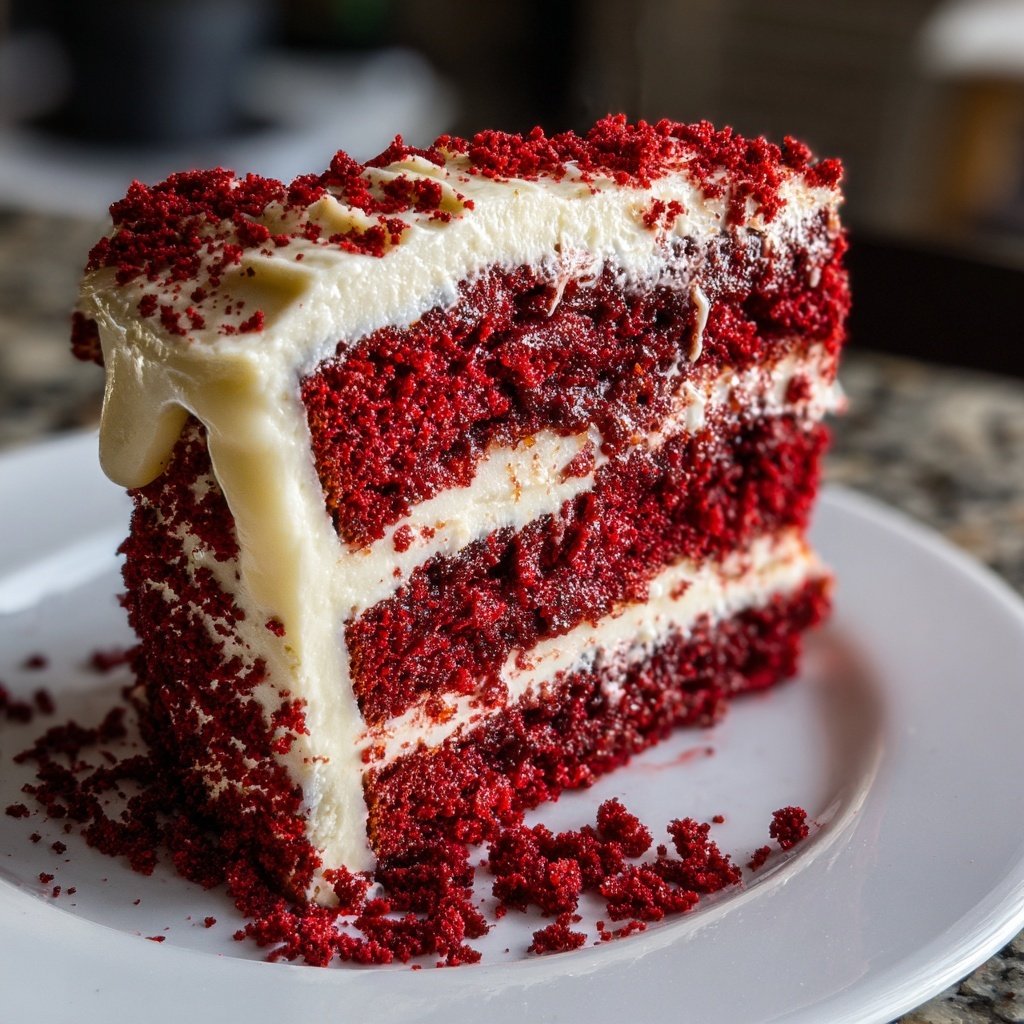
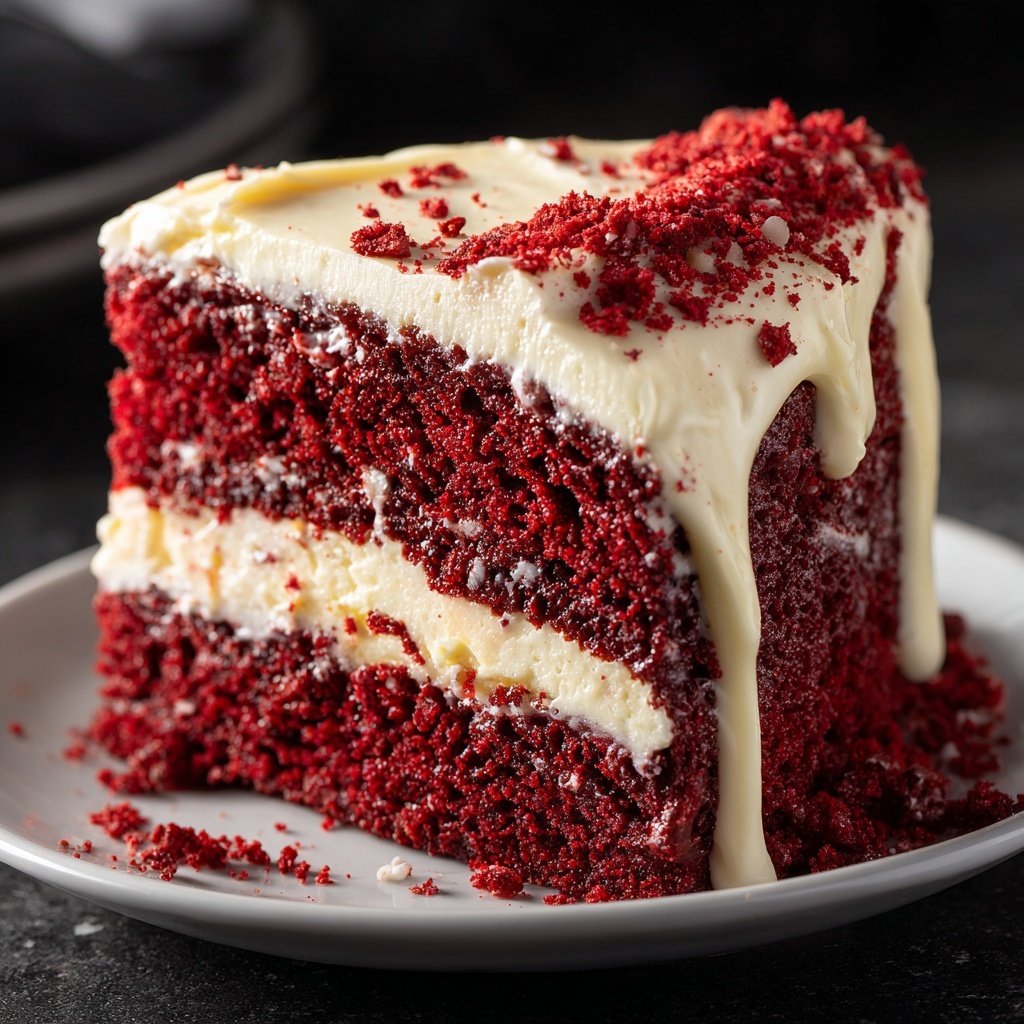
I love celebrating Valentine’s Day with a touch of sweetness, and what better way to do that than with a stunning Red Velvet Cake? This recipe has become my go-to because it combines a beautifully vibrant red color with a subtle cocoa flavor. Not to mention, the creamy cream cheese frosting is the perfect complement to this moist cake. Every time I bake it, I’m reminded of how special a homemade treat can be, especially on a day dedicated to love.
When I first made this Red Velvet Cake, I was surprised at how easily it came together. The use of buttermilk adds a tender crumb, and the vinegar reacts with the baking soda for a perfect rise. I also discovered that instead of storing it in the fridge, letting it sit at room temperature for a couple of hours before serving enhances the flavors beautifully.
What I love about this recipe is how it balances the cocoa flavor with that iconic cream cheese frosting. I always make sure to taste as I go, adjusting the vanilla and sugar to hit that sweet spot. It's a cake that simply looks gorgeous on the table and tastes even better!
Why You'll Love This Red Velvet Cake
- Vibrant color that brings joy to any celebration.
- Moist texture with a hint of cocoa.
- Creamy cream cheese frosting that adds the perfect richness.
Mastering the Red Velvet Technique
When making your Red Velvet Cake, the most crucial step is to ensure that your ingredients are at room temperature. This helps create a smooth batter that incorporates air efficiently, giving your cake a light texture. To speed up the process, you can set your eggs and buttermilk out for about 30 minutes before you start baking. This small adjustment can make a significant difference in your cake's final texture.
Another tip is to carefully monitor the mixing time when combining your wet and dry ingredients. Over-mixing can lead to a dense cake, which is not what we want for a velvety result. I recommend mixing until just combined, ensuring that you still see some flour pockets. The goal is a batter that is well-distributed but still retains some air for optimal rise.
Understanding Flavor and Ingredients
The combination of cocoa powder and red food coloring might seem unusual, but it plays an important role in balancing flavors. The subtle chocolate notes from the cocoa enhance the overall depth of the cake without overpowering the signature red velvet taste. Choose a high-quality cocoa powder for best results; this can elevate the flavor profile significantly, making each bite memorable.
Don’t overlook the impact of vinegar in this recipe; it reacts with the baking soda to create a fluffy texture. Using white vinegar is traditional, but you can also substitute with apple cider vinegar if you prefer a slightly tart flavor. This is particularly useful for those with dietary restrictions on certain ingredients.
Frosting and Serving Tips
The cream cheese frosting is not only delicious but also a critical element that complements the cake's flavor. Be sure to use full-fat cream cheese for a richer taste. If your frosting isn’t spreading well, you can add that heavy cream mentioned in the ingredients to adjust the consistency—start with one tablespoon and mix until you reach your desired texture.
When it comes to assembling your cake, I recommend using a cake leveler for even layers. This ensures that stacking is stable and easy. If you have extra frosting, consider using it as a garnish on top or around the edges. For a touch of elegance, you can decorate with fresh berries or chocolate shavings, which not only enhance the appearance but add a delightful contrasting flavor.
Ingredients
Gather these ingredients to create a delightful Red Velvet Cake:
For the Cake:
- 2 1/2 cups all-purpose flour
- 1 1/2 cups granulated sugar
- 1 teaspoon baking soda
- 1 teaspoon salt
- 1 teaspoon cocoa powder
- 1 1/2 cups vegetable oil
- 1 cup buttermilk, room temperature
- 2 large eggs, room temperature
- 2 tablespoons red food coloring
- 1 teaspoon vanilla extract
- 1 teaspoon white vinegar
For the Cream Cheese Frosting:
- 1 cup cream cheese, softened
- 1/2 cup unsalted butter, softened
- 4 cups powdered sugar
- 1 teaspoon vanilla extract
- 2 tablespoons heavy cream (optional, for consistency)
Make sure to have everything ready before you start building your cake!
Instructions
Now, let’s dive into the step-by-step process:
Preheat and Prepare Pans
Preheat your oven to 350°F (175°C). Grease and flour two 9-inch round cake pans.
Mix Dry Ingredients
In a large bowl, sift together the flour, sugar, baking soda, salt, and cocoa powder.
Combine Wet Ingredients
In another bowl, whisk together the oil, buttermilk, eggs, food coloring, vanilla, and vinegar.
Combine Mixtures
Gradually add the wet ingredients to the dry ingredients, mixing until just combined.
Bake the Cakes
Divide the batter evenly between the prepared pans and smooth the tops. Bake for 30 minutes, or until a toothpick inserted in the center comes out clean.
Cool the Cakes
Allow the cakes to cool in the pans for 10 minutes, then remove them from the pans to cool completely on a wire rack.
Prepare the Frosting
In a mixing bowl, beat the cream cheese and butter until creamy. Gradually add powdered sugar and vanilla, mixing until smooth. If the frosting is too thick, add heavy cream to loosen it.
Frost the Cake
Once the cakes are completely cool, place one layer on a serving plate, spread frosting on top, and add the second layer. Frost the top and sides of the cake as desired.
Serve and Enjoy
Slice the cake and enjoy your homemade Red Velvet Cake with loved ones!
Now you have a beautiful Red Velvet Cake ready to impress!
Pro Tips
- For an extra touch, sprinkle some chocolate shavings or red velvet crumbs on top of your frosted cake for decoration.
Making It Ahead of Time
If you plan to make this Red Velvet Cake in advance, you can store the baked layers separately in an airtight container at room temperature for up to two days. For longer storage, wrap each layer in plastic wrap and freeze; they can last up to three months. When ready to use, thaw the cake in the refrigerator overnight and frost it once completely cool.
For the frosting, I often make it a day ahead and store it in the refrigerator. Just remember to let it come to room temperature before spreading it on the cake. This ensures that it’s soft and easy to manage, making your layering and decorating much simpler.
Common Issues and Fixes
One common issue when baking Red Velvet Cake is uneven rising, which can lead to collapsing layers. This often results from incorrect oven temperature. Always use an oven thermometer to ensure that your oven is at the correct heat before baking; you want a consistent 350°F (175°C) throughout the baking process. Additionally, avoid opening the oven door frequently, as this can cause drastic temperature changes.
Another issue may be dry cake. This can happen if the mixing time is too long or if too much flour is added. Make sure to measure your flour accurately by spooning it into the measuring cup and leveling it off with a knife. If you find that your cake is dry, don't hesitate to brush the layers with a simple syrup before frosting. A mix of water and sugar heated until dissolved works well to moisten the cake.
Questions About Recipes
→ Can I make this cake in advance?
Yes, you can bake the cakes a day ahead and store them in the refrigerator. Frost them just before serving for the best taste.
→ What type of food coloring should I use?
I recommend using gel food coloring for a more vibrant color without altering the texture.
→ Is there a gluten-free option for this cake?
You can substitute all-purpose flour with a gluten-free blend, but results may vary slightly.
→ Can I freeze the cake?
Absolutely! You can freeze the cake layers before frosting. Wrap them tightly in plastic wrap and store them in an airtight container for up to 3 months.
Red Velvet Cake for Valentine’s Day
Created by: Questa Beaumont
Recipe Type: Festive Planning
Skill Level: Intermediate
Final Quantity: 12 slices
What You'll Need
For the Cake:
- 2 1/2 cups all-purpose flour
- 1 1/2 cups granulated sugar
- 1 teaspoon baking soda
- 1 teaspoon salt
- 1 teaspoon cocoa powder
- 1 1/2 cups vegetable oil
- 1 cup buttermilk, room temperature
- 2 large eggs, room temperature
- 2 tablespoons red food coloring
- 1 teaspoon vanilla extract
- 1 teaspoon white vinegar
For the Cream Cheese Frosting:
- 1 cup cream cheese, softened
- 1/2 cup unsalted butter, softened
- 4 cups powdered sugar
- 1 teaspoon vanilla extract
- 2 tablespoons heavy cream (optional, for consistency)
How-To Steps
Preheat your oven to 350°F (175°C). Grease and flour two 9-inch round cake pans.
In a large bowl, sift together the flour, sugar, baking soda, salt, and cocoa powder.
In another bowl, whisk together the oil, buttermilk, eggs, food coloring, vanilla, and vinegar.
Gradually add the wet ingredients to the dry ingredients, mixing until just combined.
Divide the batter evenly between the prepared pans and smooth the tops. Bake for 30 minutes, or until a toothpick inserted in the center comes out clean.
Allow the cakes to cool in the pans for 10 minutes, then remove them from the pans to cool completely on a wire rack.
In a mixing bowl, beat the cream cheese and butter until creamy. Gradually add powdered sugar and vanilla, mixing until smooth. If the frosting is too thick, add heavy cream to loosen it.
Once the cakes are completely cool, place one layer on a serving plate, spread frosting on top, and add the second layer. Frost the top and sides of the cake as desired.
Slice the cake and enjoy your homemade Red Velvet Cake with loved ones!
Extra Tips
- For an extra touch, sprinkle some chocolate shavings or red velvet crumbs on top of your frosted cake for decoration.
Nutritional Breakdown (Per Serving)
- Calories: 380 kcal
- Total Fat: 26g
- Saturated Fat: 15g
- Cholesterol: 195mg
- Sodium: 85mg
- Total Carbohydrates: 32g
- Dietary Fiber: 3g
- Sugars: 24g
- Protein: 6g